

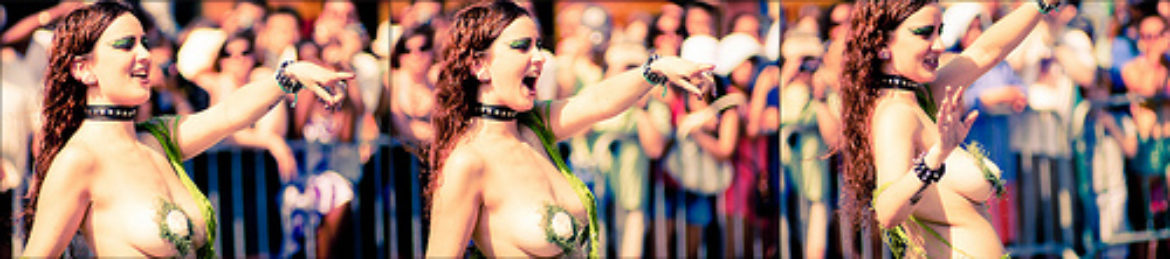

I long-planned to Coney Island on June 19th as soon as I got notice of the official date of the annual Mermaid parade event. Only the old or the bitter, perhaps the old and bitter are the only ones that hate a parade right? And this definitely isn’t for the old, for more reasons than one. http://www.flickr.com/photos/catseyez/sets/72157624198196837/ )
I also long-planned to use a new lens that I’ve been saving for. regrettably, the lens hasn’t made it off its’ shelf yet…not enough saved up for it. It’s the Canon 85mm f1.8, a gem of a lens. I’m probably going to be a bit too excited the day I mount that bad boy on my T1I. Anyway, I looked rather dismally at my prospect lenses for the parade, an 18-200mm Tamron f3.5-6.3 zoom lens, and a 70-210mm f/4 Canon lens- which I have in fact used with success at a previous annual parade event-but I suppose I’ve been envying some of the images I’ve seen other photographers take with that lens, especially at parades. Lens envy is a terrible, costly thing, but I do keep it in check. I’ve decided to invest in about one or two more lenses in the next 3-4 years unless I decide to replace/upgrade my currently owned lot, and/or move to a full frame camera. I digress, the least I could hope for was a sunny day, else I’d have a crummy time trying to focus quickly and accurately with these narrow aperture lenses. I don’t yet own the coveted Luxury “L” series f 2.8 70-200mm Canon lens. In no small part due to its $2k price point – inconveniently situated out of financial reach for the time being. I got what I’d hoped for and more on the 19th, it was a bright, sunny, and warm day. I decided to pack my Tamron 17-50mm f2.8 lens, just incase I got the chance to shoot some portrait shots, or incase I remained at coney island until sunset when I might desire the properties of that particular lens. Considering the sunny lighting conditions of the day, I decided to implement a different technique for this event. SUNNY 16 is a classical photographers technique for getting proper exposure in bright sunlight. The simple rule states that on a sunny day, setting your aperture to f/16 and a shutter speed as close to the ISO speed as possible will result in a properly exposed image. No need for a light meter, since you’ll always know what range to keep move your shutter speed relative to your ISO and aperture based on these initial conditions. Of course, you’re not using a point and shoot camera or using AUTO settings to effect this rule. You must be in Manual mode and in control of all the variables mentioned. Why go manual when the AUTO does a good job you may ask ? As a matter of fact It’s widely accepted or understood among photographers that the in-camera electronic light meters, which are actually designed to deliver you AUTOmatically the proper exposure, can be fooled by contrasty scenes, and by a variety of other circumstances. Sunny 16 is a rule because it always, always, always will work , under sunny conditions. And in other situations like overcast, there is another helpful rule- for another day. Consider the following figure ( This gets pretty technical here, you may want to skip to the end, or just look at my flickr feed from here on)

Each line represents one full f stop and its potential corresponding Shutter/ISO settings. Sunny 16 states that when we select f/16 and keep the ISO 100, that the appropriate shutter speed for good exposure will be the reciprocal of the ISO, 1/100. It actually centers on a range of about 1/100-1/200 sec . The take-away point being to get as CLOSE to your ISO as you can for a decent exposure. Now, f/16 may be limiting in terms of creative options, and you wont be able to separate your subject from the background very cleanly, but remember, it’s just the starting point for the rule. The best utilization of the rule requires an understanding of a few key things. First, know what it is that your Aperture setting (AV mode) controls in terms of what kind of picture will result. Wider apertures (smaller numbers) will make your subject pop out of a blurred background. Narrower apertures,(larger numbers) f/8.0 and up, will focus more and more of the subject in your frame. In order to achieve a “portrait” style photograph using a wider aperture, f/2.8 for instance, you need to open up or stop down your aperture. Yes, opening up is equivalent to stopping down, you’ll get used to the terminology if you read more on technical photography, but for now, think of opening up as literally opening up the aperture (hole) that lets light through the lens and toward the sensor. Stopping down is the jargon terminology which describes this action. Stopping up represents movement in the other direction, narrowing the hole. From the Sunny 16 starting point, a change to f2.8 represents a change of 5 full stops. Count em on the figure. Moving up the chart to f2.8 moves 5 levels up, 5 full stops. This exposes the camera’s sensor to a lot more light because you’re opening up the lens’ iris, so we’ll have to change the shutter speed by an equivalent factor to compensate. According to the rule, each stop of light added or subtracted requires a doubling or halving of the shutter speed respectively. 5 stops added to a setting of f/16 @ 1/100 sec results in a new f-stop/shutter speed combination of f 2.8- 1/3200 sec (multiply the denominator by 2 each advancing stop upwards). Given that Iso remains fixed, you’ll have a properly exposed image with these settings on a bright sunlit day. It really works…I tried this out today for the first time and I was happy with every single shots’ exposure. every1. I must say that I’ve seldom been disappointed with my cameras AV mode, and its ability to properly expose shots at the common apertures I use….and I rarely go beyond f5.6, but today’s circumstances-the parade- demanded that I aim to get as much in focus of a moving subject, so sunny 16 was a great rule to try out because it would get my mind working around the theory of light and sensor technology and generally get me off the crutch of depending on the camera to adjust the shutter speeds for me. Manual mode is where I plan to make my home under controlled lighting and for outdoor sunny daylight photography. Now, here’s the rub. Your subject matter won’t always be favorably photographed within the confines of ISO 100. Case in point, I dialed my camera into an ISO of 400 today. The reason being that the shutter speeds ranging from 1/100 to 1/250 which the rule implies are reasonable for an ISO of 100 f/16, just weren’t action freezing/ non-blurring enough to capture the parade go’ers as they skipped and danced up and down the streets. So I had to bump the ISO upwards. You will learn with experience how and why these kinds of ISO adjustments become necessary. There’s mainly one reason why raising ISO too much is no longer desirable or practical however. It’s that with an increase in ISO ( which is a measure electronic sensors sensitivity to light), you get a corresponding increase in the noise/grain of an image. It’s a thermodynamic limitation or something… whenever you increase the pixel sites sensitivity of light (bump ISO UP), you also increase the probability of that sensor or its photo gathering sites (pixels) picking up of erroneous and VERY ugly color misinformation ; which results in that characteristic grainy, tonally flat image you’ll get on most point and shoot cameras in low light or indoor situations. The same is true with SLR photography in low light, but because an SLR’s sensor is much much larger than a point and shoots’ sensor, it’s capable of gathering much more reliable light information. Said another way, an SLR sensor can see more light, and so, the integrity of the information an SLR sensor sees when compared to a tiny sensor’d point and shoot varies by many orders of magnitude- due to laws of physics n junk. My Canon Rebel T1I has pretty good signal/noise properties up to about ISO 1600. Beyond 1600 pics are barely usable, and by usable, I mean printable. Anyway, I was comfortable enough with my camera’s image quality and noise properties to bump it up to Iso 400. So I did so in order to take advantage of the faster shutter speeds it would afford me to use to get properly exposed images. I learned a lot out there on the parade route. I went there with certain things already in consideration as far as photographic strategies. I knew for example, that I had to get there early for a good spot. Check. Other things I considered on the scene were key things specific to parades. I decided to set up shop toward the end of the parade route, perhaps about a 15 minute walk from where the physical terminal point would be- for one actually marching. I thought ” Yeah , yeah this is good. I’ll capture most of the folks and floats this way.” I came up to the point where the judging took place and thought again, “Sweet, it’s empty and I can get a good spot in prime view of where the floats will be performing and stopping in front of the judges.” I thought it best to be on the same side of the street the judges were on , because the patrons would be facing me and the judges, duh. So I crossed over there. I realized immediately I’d be giving up on capturing the cyclone, and coney island background in the context of the marching mermaids, but cool… I’ll be better off. Hmph. I settled down in a spot behind another photographer who was sitting on the ground on the asphalt, I had the curb , a height advantage I thought. Hmph. Lesson #1. Don’t stand near other photographers at a parade. And don’t stand near or behind taller photographers! Their elbows will flare out, their hair will be in your shots if they’re in front of you…and it’s just a mess, more than I think it should be. Lesson # 2. If you can help it, don’t stand next to any videographers with hand-held cameras or PHONE cameras (really?!). I learned today these lessons, which I will impart to you for the betterment of the community of photographers, of your pictures and your experience at these events. As the procession began, I realized that because of the judging stands’ projecting into the street a fair amount, that there was an even narrower field of view when I peered down the street to the oncoming patrons. They were funneled once they approached the stands for judging. This was irritating, especially as there were press, and several non press photographers just behind the judging stands that would crowd the middle of the street BLOCKING the performances. Teaching moment: if you want to be around the judges, it is best to FACE the judges, be on the opposite side of the street. This way photographers aren’t sandwiching the performers, at least with respect to your camera’s point of view, and you will most likely have the best view on the opposite side of street as the judges stand. With the caveat that you may have given up scenery context in your picture, and you may have an ugly bleachers show up in a few shots, unless you shoot telephoto, in which case this is much easier to manage, so I recommend telephoto lenses for this strategy. There’s always another parade. I know now what I will aim for when I shoot upcoming parades like the West Indian annual labor day parade, where I plan to have that 85mm 1.8, Bien sur! I’ll post the parade images to my Flickr in a set for those of you interested in just how the sunny 16 rule and its application worked out for me. Click the link ( http://www.flickr.com/photos/catseyez/sets/72157624198196837/ ). ***6/16/2011 edit : PICTURES!


Related articles on the web
- The 29th Annual Coney Island Mermaid Parade (laughingsquid.com)

nice article, keep the posts coming